Kiln Drying Services:
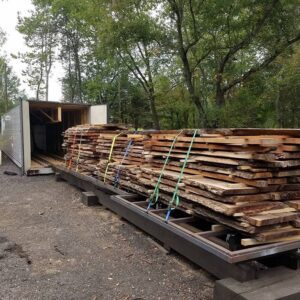
At Eco-Friendly Lumber, we offer professional kiln drying services using both a Nyle L200 dehumidification kiln and an iDry vacuum kiln, ensuring your lumber is dried efficiently and to the highest quality standards. The Nyle L200 system uses controlled heat and humidity to gently remove moisture from wood over time, preserving the wood’s integrity and reducing the risk of cracking or warping. This method is ideal for drying large quantities of lumber with consistent results and is especially effective for thicker, dense hardwoods.
Our iDry vacuum kiln takes drying to the next level with advanced vacuum technology that significantly reduces drying time. By lowering the atmospheric pressure inside the chamber, the iDry system allows water to evaporate at lower temperatures, making it ideal for faster turnaround without compromising wood quality. This method not only accelerates the drying process but also enhances color retention and minimizes defects. Whether you're preparing live-edge slabs, dimensional lumber, or custom cuts, our dual-system approach ensures optimal moisture content and a ready-to-use product for any woodworking project.

1. Purpose of Air Drying
Air drying lumber serves as a preliminary step to:
-
Reduce the initial moisture content (MC) economically.
-
Minimize kiln energy usage.
-
Prevent drying defects like checking, warping, and honeycombing.
-
Improve kiln throughput and efficiency.
2. Site Selection
Key factors:
-
Location: Choose an elevated, well-drained area to prevent moisture accumulation.
-
Airflow: Ensure exposure to prevailing winds for optimal natural drying.
-
Sunlight: Partial shade is ideal to prevent surface checking from rapid drying.
-
Accessibility: Easy access for loading/unloading with forklifts or tractors.
3. Lumber Preparation
End Sealing
-
Immediately after sawing, seal the ends of each board with a wax-based or commercial end-sealer (e.g., Anchorseal).
-
This reduces end checking caused by rapid moisture loss at board ends.
Sorting and Stacking by Species & Thickness
-
Group similar species and thicknesses to ensure uniform drying rates.
-
Mark stacks accordingly for tracking.
4. Stickering and Stacking
Sticker Materials
-
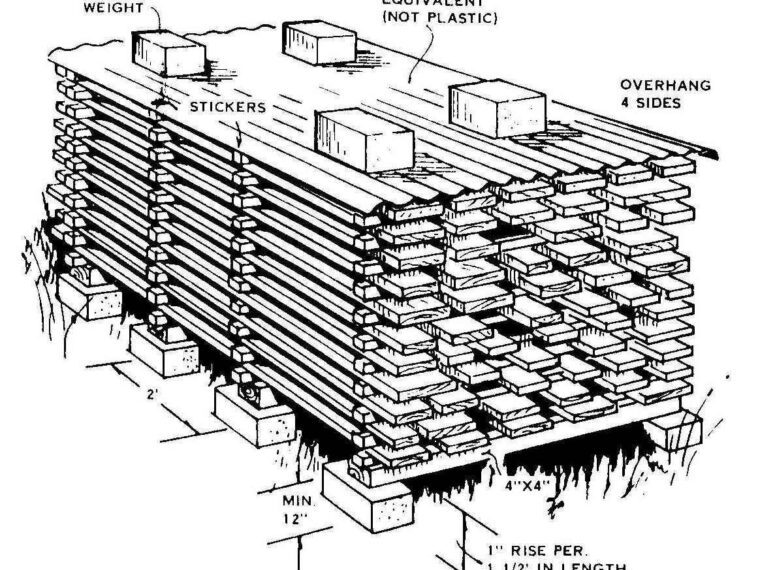
Use dry, uniform, decay-resistant stickers (usually ¾” thick, 1–1½” wide).
-
Avoid green or wet stickers—they can cause staining or mold.
Sticker Placement
-
Place stickers vertically aligned every 16–24 inches (or according to the shortest board).
-
Stickers should line up perfectly from bottom to top to maintain stack integrity.
Stack Construction
-
Place lumber on a stable, level base (concrete blocks or treated skids at least 6–8” off the ground).
-
Use crossbeams under sticker lines for weight distribution.
-
Align boards evenly with minimal overhang.
-
Cover the top with a waterproof, UV-resistant material (e.g., tin roofing), sloped for runoff—leave sides open for airflow.
5. Air Drying Conditions
Climate Considerations
-
Warm and dry climates: Faster drying, but higher risk of checking—may require extra shade or humidification.
-
Cool and humid climates: Slower drying—may take several months or up to a year depending on species and thickness.
Monitoring Moisture
-
Use a moisture meter (pin or pinless) to monitor the MC weekly.
-
Target MC: Bring lumber down to 20–25% before kiln drying.
6. Duration of Air Drying
Estimated times depend on species, thickness, and climate:
| Species | Thickness | Air Dry Time to ~25% MC |
|---|---|---|
| Softwoods (e.g., pine) | 1 inch | 1–2 months |
| Hardwoods (e.g., oak) | 1 inch | 3–6 months |
| Any species (thicker stock) | 2 inches | 6–12 months |
7. Pest and Mold Prevention
-
Keep area clean of debris and vegetation.
-
Ensure good air circulation and sticker spacing.
-
Treat lumber or stacks with anti-fungal agents if needed, especially in humid environments.
8. Transition to Kiln Drying
Once MC is reduced to 20–25%:
-
Transport stacks gently to the kiln.
-
Remove and inspect stickers for mold or damage.
-
Re-stack uniformly in the kiln using proper stickering methods.
